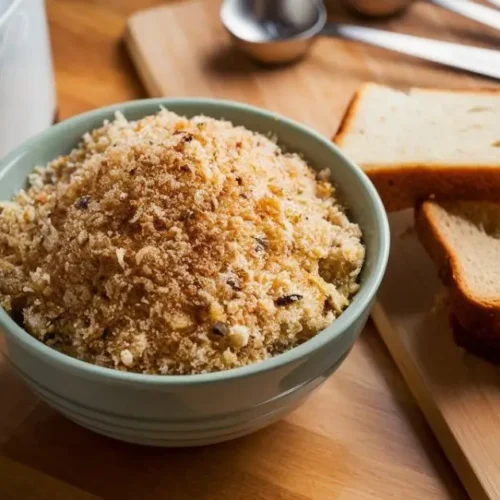
Easy Gluten Free Bread Crumbs recipe
Many store-bought options are expensive, heavily processed, or lack that crispy, golden texture essential for breading and toppings. That’s where homemade gluten-free bread crumbs come in!
Ingredients
- Basic Ingredients:
- 2 cups gluten-free bread any type—white, whole grain, sourdough, or even leftover rolls
- ½ teaspoon salt adjust to taste
- Optional Add-Ins for Extra Flavor:
- ½ teaspoon garlic powder – Adds a subtle savory depth.
- ½ teaspoon onion powder – Enhances the overall flavor.
- 1 teaspoon Italian seasoning – Perfect for a Mediterranean touch.
- ¼ teaspoon black pepper – A mild kick of spice.
- ½ teaspoon smoked paprika – Adds a hint of warmth and color.
Instructions
- Step 1: Prepare the Bread
- Preheat your oven to 300°F (150°C). A low temperature helps dry out the bread without burning it.
- Slice or cube your gluten-free bread into small pieces. If it’s already stale, you can skip this step and move straight to toasting.
- Spread the bread pieces in a single layer on a baking sheet. Avoid overlapping to ensure even drying.
- Step 2: Toast for Maximum Crunch
- Place the baking sheet in the oven and bake for 10–15 minutes, flipping halfway through. The bread should feel dry and crisp but not browned.
- Let the bread cool completely before blending. Warm bread may create steam, leading to soggy crumbs.
- Step 3: Blend into Bread Crumbs
- Transfer the dried bread into a food processor or blender.
- Pulse in short bursts until you reach your desired texture—coarse for added crunch or fine for breading. If you don’t have a food processor, use a box grater or a rolling pin inside a zip-top bag.
- Optional: If making seasoned bread crumbs, stir in your favorite spices, like garlic powder, Italian seasoning, or paprika.
- Step 4: Store for Freshness
- Transfer the crumbs to an airtight container or jar to keep them fresh. Store at:
- Room temperature for up to 2 weeks
- Refrigerator for up to 1 month
- Freezer for up to 3 months (just thaw before using)
- Pro Tip: If your bread crumbs feel slightly soft after storage, re-toast them in the oven at 300°F (150°C) for 5 minutes to restore their crispiness.